Saturday, December 20, 2008

All I Wanted To Know I Learned at the Craft Fair... or The Newbie's Newbie Guide To Doing Your First Show!

(yes, that's me behind the scenes)

I took the plunge and thanks to a fellow Etsian, I entered my first juried craft fair - my first one ever! And for a first craft fair, I have to admit that I was pleasantly surprised and did much better than I thought I would have! Three days of selling my wares and talking up my craft... and I'm still alive! House of Mouse asked me to write about what I learned, so here it is!


1. Juried Shows ROCK!
Tthe MACFair was a juried show, which meant that they chose the vendors who were at the show. You know how at some shows there are tons of resellers and the handmade goodness gets overlooked? Well, that DIDN'T happen here and it was amazing to see all the talent - not to mention the full time artisans - on display. Even though there was an entry fee, it was worth it! (more on that in a bit)

2. Prepare, Prepare, Prepare!
I have to admit that I was at a little bit of a disadvantage here with all my "prep time" being swallowed up by my first trimester - all day morning sickness. I was a little freaked that I didn't have enough energy to make all the things that I wanted to make, but I tried to get some work done in the precious moments that I didn't feel sick. Thank goodness that the week before the show my energy levels lifted... but I still didn't feel like I had adequate stock.

3. Displays Don't Have to be Expensive
... but it does help to have a plan! - see the rant above about my morning sickness- However, I had talked my display ideas out with the husband and my cousin and had a general idea about what I wanted to do and the feeling I wanted to create with my display. I basically used twigs, river stones, floral foam and little metal pails to create "trees" for my necklaces; a fabric shower curtain in a neutral tone to cover the table, wooden and velvet trays for rings, pine cones and seashells for bracelets, and a small moses basket for my sock monkeys. The picture here probably gives you a better idea of what I did:


It was very simple, very inexpensive, and I got countless compliments! However, some of the more experienced vendors DID have fantastic displays - self-contained with lights and shelving... I have to admit that I felt like I was out of my league at the beginning and it was a little disheartening. However, this display was perfect for the space I had (a 3" x 6" table) and it was easy for me to assemble and dismantle. Because the show was in a gallery-type setting, the lighting was already almost perfect.

4. You Will Need Things That You Didn't Think You Would!
Etsy has some threads in the forums outlining lists of essential items that you will need at a show. I took the advice in those threads and am adding some of my items here too:
  • Scotch & duct tape (we taped the shower curtain to the table to reduce the risk of slippage - something i didn't think of until we were set up)
  • Paper towels (we didn't use any until the very last day, as we were pulling things apart but it sure helped with an accidental spill!!)
  • Lots and lots of business cards! I actually will look into printing bookmarks or MOO cards because it would have been worth it. I gave out about 75 - 100 cards over the three days and would have liked something a little more "professional" looking .
  • A little bowl of candy. A nice touch, draws people in and keeps their kids occupied as they browse!
  • Good signs and tags - I used dollar store plastic frames to hold up my signs, and perfect little tags to put the prices on my items (people STILL asked though, so be prepared!). I also kept some extra tags on hand for items that i made while I was at the show
  • Little snacks and plenty of liquids.
  • Several pens (for people who write cheques as well as for your receipts and doodling) and a permanent marker (for signs etc.)
  • Little clear bags to put small items in, along with some sort of bag or envelope to put that little bag in.
  • A mirror - you'd be amazed how many people want to try on your stuff and see what it looks like! I put in a small mirror as an afterthought... and i am so glad that i did!
  • Change - i took $100 in loonies and toonies and miscellaneous coinage and while i barely dipped into it, I was happy knowing it was there!
  • A craft apron! - I got mine from Yoopers etsy store and it was indispensable! She made mine with a little zippered pocket in the front for money, and other little pockets, in which I put my price tags, pens, receipt book and lip gloss. Although i had ordered it earlier in the summer once I found out I was accepted into the show, it still fit perfectly around my pregnant belly! One of the other vendors laughed and asked if I was putting on my "money belt"... well, I was never without a pen or paper, I can tell ya! (and yes, there did end up being money in there - so THERE!)
  • Lip balm/gloss - it was dry in the venue - plus I was getting a little chapped from all the talking! I was definitely thankful!
  • Plastic bag(s) - for garbage and in case someone buys a lot of stuff
  • Layers, as in a sweater - the locale we were in was kind of cool (for non-pregnant people!) and the sweater and scarf I bought was quite useful at times!
5. Someone Dependable to Help You
I had brought the husband to help set up (and then he went to sit in the car - craft shows aren't too great for guys unless they themselves are the crafter). But he did come and sit with me so I could have a little bit of a break and some company during the slower times. We also had a wonderful organizer (thank you, Jude!) who could watch your booth while you dashed off to the bathroom or to grab something quick to eat/drink.


(My friend Teri - who was a fabulous assistant! thanks, T!)

6. A Strong Backbone, Courage and Confidence in Your Craft!
'Nuff said. People will have positive things to say about you and your work... and will also have snide comments to make as well. just be confident and have pride in what you do!
I have to admit that once I submitted my application to the show and even after they accepted me, I still waffled about going. However, it really paid off and I got to meet some wonderful people. I'm glad I didn't back out!

About the author: Cy Rainville is the gal behind http://muffintopdesigns.etsy.com and http://muffintopsyturvy.etsy.com . She has been selling on etsy since August 2007 and is continually working on new designs (when her full time job, pregnancy and browsing on etsy allows!)

Thursday, December 18, 2008

Uploading your items to Google Base

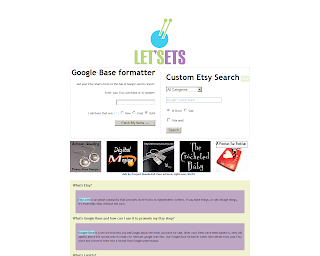
I have seen my share of forum threads discussing the process of uploading products into Google Base. I for one never had the time to sit down and learn the big 'how to'. I was however very excited to learn of the site Let's Ets. This site has some very clever tools but the one I was eager to try was the Google Base Formatter. All you do is plug in your Etsy ID or username and click the fetch button.

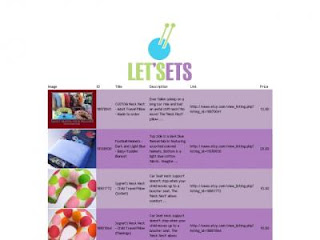
On the next screen you will see a list of your etsy products, images, descriptions, and price. Look them over very carefully so all is in order. (*Note only the first 100 items are included)


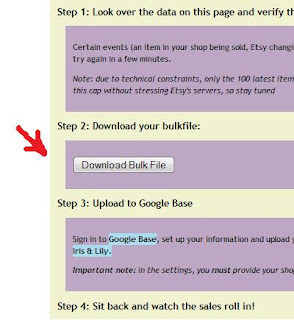
At the very bottom of the page click the 'download bulk file' button. A window will pop up giving you the choice to either open or save. Make sure you click save. The file name will be your username followed by the .xml file type.


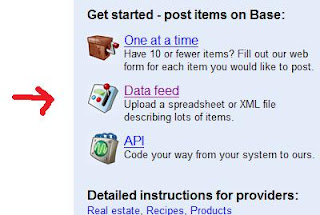
Now on to uploading that file to Google Base..... http://google.com/base Once there click the data feed button and login if necessary. At the top there are two tabs. Click settings and make sure to include your etsy shop url in the website box. This is important when uploading your file. Click next and register your feed. Insure you select products from the drop down menu. The data feed file name is the same file name you downloaded earlier (usename.xml) Register your feed.

Once completed you will see the file name. Next to that is uploads. Click to manually upload your file now. Locate the file on your computer using the pop up window. Click upload and process file. You should now see the words 'Processing'. In a few moments (hours) your items will be uploaded and visible using the my items tab to the top right. If for some reason it comes back 'failed' try this processes over again and make sure all file names match. Your feed will stay live for 30 days. At that time you can repeat all of the above and stay active in the google shopping searches. Good Luck.


About the author: I am Amanda, owner extraordinaire of Sygnet Creations. I have been selling on etsy for over a year now and I loving it! I am a full time mom and military spouse. I tend to know a little about everything and I am always a friendly ear and convo away. Ask me anything.

Friday, December 12, 2008

Sellers Tip: Thumbnail Photos

Sharing some tips for a better Etsy Store.

Thumbnails

When someone views your store they usually do so in "gallery mode" this is when the images are the same size as the ones featured on the front page. To put your store in gallery mode just click the link for "gallery" under your shop announcement. This is your store "window", the first thing your buyers see when they come to your shop. You should try to make each thumbnail look the best it can, which means taking into account the way your first image is cropped to fit it. To get the best out of your thumbnails try to take the photo you will use for the first image as a "horizontal" rectangle, aka "landscape" so that little of the composition of the photo is lost when viewed as a thumbnail.

These thumbnail photos are also how your listings are viewed in treasuries, having a great thumbnail increases your chances of making it into a treasury and therefore your chance of making it onto the Etsy Home Page. Always make sure that the first photo for your listing is the best one from your collection!

About the Author: Anna Greaves is the founder of the Sellers Assisting Sellers team and runs her shop The House of Mouse full time from her home in The Netherlands.

Thursday, December 11, 2008

My Top 10 Tips for making a Front Page worthy treasury

Learning to make a great treasury is an art. It is also an important education for any seller who wants to get their work featured on the Front Page of Etsy. If you take the time to learn what makes a treasury worthy of the Etsy Front Page, you will quickly learn how to make your listings the kind that will get chosen for that honor.

Take a look at the Etsy Front Page Flickr group. This is full of screencaps of treasuries that have been on the front page. Notice how each one looks amazing, the photos are top quality and the treasury always has a theme, be it a shape, color or something else.

For those of you who don't know what a treasury is or how to catch one check out this article.

As a seller who was been both curator for and featured in Etsy Home Page treasuries, here are my top 10 tips for making a Front Page worthy treasury.

1) Use the Etsy Poster Sketch.
You can build as many treasuries as you like there, although only you can see them. You can always save your sketches to use when you actually manage to grab a treasury. (bookmark it in your browser because the link to it is hard to find on Etsy)

2) Choose a theme.
The theme can be colour, tone, shape, emotion or anything else you like. You can also pick one listing from your favorites to start with; try to find other listings that match it in some way. Think of your entire treasury as a piece of art, each listing should go well with the others.

3) Use the Etsy Tag Fractal.
you can use the Tag Fractal to search for listings that fit your theme, you can search based on their titles and tags here. It is a great tool. (bookmark this one too)

4) Choose listings that look great a thumbnails.
Take a look at my next post for further explanation on this

5) Vary the types of listings in your treasury.
Unless your theme is a certain type or category of listing, try to avoid having too many of the same kind of listing in your treasury. For example, not more than 2 pairs of earrings, 2 toys, 2 illustrations etc...

6) Vary the prices of the listings in your treasury.

When Admin choose a treasury for the front page they make sure that the price range varies. they don't want everything to sell out before that front page's time is up. If everything is too inexpensive then the items will sell out too fast and cause technical difficulties for the front page. To read more about what Etsy Admin said about this check out this forum thread

7) Fill up all the alternatives.

When you make a treasury you get 16 slots to show off, but only the 12 on the left can be seen. The other 4 are called the alternatives. If your treasury makes it to the front page then when something sells one of your alternatives will take its place. Admin will only ever choose a treasury that is full, including the alternatives. Make sure your alternatives are just as good as the others.

8) Don't feature yourself.
You are allowed to feature yourself in one listing of your own treasury, but if your treasury gets picked for the front page then your listing will get swapped out for an alternative. From an Admin's point of view you will only have 3 alternatives instead of 4 as they won't ever have the curator of a treasury featured on the FP too. It lowers your chances significantly and it is considered by some to be an "unwritten rule" of making treasuries.

9) Choose an interesting title.

Titles are hard to come up with, so while you are filling your Poster Sketch try to think about your theme and what title would go well with it. A good title will get a few more people clicking on it, just to see what is in there. I should say that Etsy Admin has stated that they don't pay any attention to a treasury title, they are interested in how it looks and the price ranges it includes, so it’s not essential.

10) Promote your treasury
When you have caught a treasury and filled it, tell your friends about it. If you belong to an Etsy Street Team then post it in your team thread. If you are on Twitter then post the link there too. If there are threads in the forums sharing the latest treasuries then post there too... you get the idea. The more views, clicks and comments your treasury gets the "hotter" it becomes and the higher up the treasury list it will go. The more people see that you make great treasuries, the more chances you have of making it on the Front Page one day.

Good luck and happy treasury making!

About the Author: Anna Greaves is the founder of the Sellers Assisting Sellers team and runs her shop The House of Mouse full time from her home in The Netherlands.