Saturday, January 1, 2011

How to use a light box and photo editing software to make beautiful photographs

Written by TheHouseofMouse

Great photos are one of the most important things to get right if you sell online. Your photographs are your virtual shop window: If they are not light, bright and eye-catching then often buyers will surf right past your store without even noticing your work. Really beautiful photographs will bring buyers through your virtual door and keep them there long enough to remember your creations.

These photography tips are designed to help you make your photographs looks bright, eye catching and professional and you don't need to have an expensive camera to do this!

This tutorial comes in two parts:
  1. How to make a Light Box
  2. How to edit your photos to make them pop
I use both processes for all of my photographs.

Part 1: How to make a Light Box
These tips are one way of taking great photos, but they are certainly not the only way. I hope that you will be able to use this tutorial as a starting point and gain the confidence to make photographs with your own style.

First select a box that is the right size for what you want to photograph. For small items like jewelery a box about 30cm wide or 1 foot is good, although if you want to photograph larger items you will need a larger box.


Cut out the top of the box and the front, leaving a bar across the top to help your box keep it's shape


Line your box with white paper, making a curve with paper in the back horizontal corner so that it won't show up in your background.


Make sure you put white paper on the sides too, this will help to bounce the light around even more and make your photographs really bright.


To avoid any lines in your photographs, use a large piece of paper for your backdrop, I love to have a white background so I am using a piece of A3 white card, but you can use any color you like. You can also use fabric if you prefer.


Stick or pin your background in place,
again making a curve in the horizontal corner.


Your light source should be 2 adjustable lamps with daylight light bulbs, 100watts will get a great result. Daylight light bulbs are best because the colors in your photographs will be more accurate than if you use a regular yellowish bulb. Daylight light bulbs look bluish when they are not on. You can get daylight light bulbs from any good electrical store, some art supply stores also stock them as painters prefer to use them too.


Arrange your lamps on either side of your light box, if the stands poke under your box -as they do in mine - then stand your box on some books to make it flat. Some people prefer to just use one lamp, but I find using 2 will eliminate all shadows and shows up the details on your work much better.


As you can see, when the bulbs are on the light bounces around in the box in all directions! Perfect for taking bright photographs


If you have a tripod for your camera then set it up in front of your light box, if you don't have a tripod then add one to your christmas list! For now you can stand your camera on something to balance it.

The reason for the tripod is that you don't want to be using the flash on your camera. If you turn off the flash on some cameras then any photographs taken with the camera in your hands will look shaky, the tripod will keep it stable and make your photos nice and clear.

Finally your light box is ready! Place your items in your light box, switch on your lamps, arrange your camera (remember to switch off your flash) and take some photographs!

Every camera is different, some of you may find that you are happy with the photos you get just from the light box. But if you are like me you will still want to make them brighter. Part 2 explains how to do this...

Part 2: How to edit your photos to make them pop
So you have your photos from your light box, but they are still a little dark and dreary. This tutorial will show you how to edit your photos to brighten them up and make them really pop!

To do this you will be using the "levels" tool that is found in almost every photo editing software. I will be using Photoshop for this tutorial. If you don't have any photo editing software then I recommend you try picnic which is a free and simple photo editing site (to get to the levels tool on picnic: upload a photo, then click "exposure" and then "advanced").

To open the levels tool in Photoshop, click the "layer" menu then "new adjustment layer" and select "levels", then click "ok" to open the tool.


The levels tool looks like a graph or histogram. By using the dropper feature and sliding the arrows around you can create different effects, including lightening up your photographs.

Use the dropper feature to select the lightest color in your photograph. (The dropper does not appear on the picnic website, but it will appear in Photoshop and a few other photo editing programs.)

The dropper is the 3 little icons in the bottom right corner of the levels too. You can use these to select the darkest, lightest and medium tones from your photograph. For my purposes I only want to use the lightest one (on the far right) but feel free to play around with them to see the affects you can get.


Select the white dropper and then click it on the lightest part of your photograph. You can keep choosing a new part until you are happy with the result. As you can see, I have selected the brightest area of my background. This will automatically readjust the photograph.

Next you can also use the arrows on the slider under your histogram to lighten or darken your photograph further. If you are using picnic then this will be your main way to lighten your photographs. Click the arrow in the middle of your histogram and slide it to the left and right to see the results

Slide it to the left to lighten your photograph


Or slide it to the right to make it darker


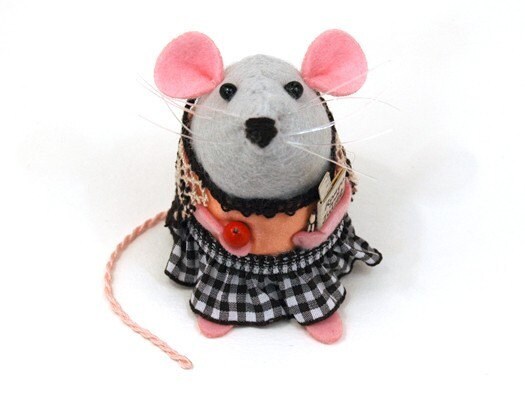
I just want to lighten my photograph slightly so that you can pick out the details in the Cellist Mouse's skirt. When you are happy with your adjustments click "ok"


If you are using Photoshop, you will need to "flatten" your image before you can save your document as a .jpg . To do this select the "layer" menu and click "flatten image" you are now free to save your file. Feel free to crop your image if you want to before you save.

Here is what my photograph looks like before and after using Photoshop to brighten it up...


Written by TheHouseofMouse


Tuesday, November 9, 2010

Twitter - The Power of Social Networking

Written by crochetgal.etsy.com

Think of joining Twitter as going to a very large cocktail party by yourself. When you first walk into the room (ie join twitter) you don't know anyone at all. So you start 'following' and chatting with a few people. Slowly your network grows. You find others who share the same interests as you and chat some more. If people want to find out more about you they can take a look at your twitter profile and read your bio or click through on your web address.

Think of it this way when you include links to your shop.. if you walked into a room and people shouted at you from all sides 'by me' our 'check me out', what would you do?

My success with Twitter has been to consider it a very large chat room. Its all about making the contacts. Once the contacts have been made then people will buy!

If you are just starting out, the following definitions might be of some help:


tweet - the act of posting something on twitter. This is the single most important thing that will affect whether or not twitter is right for you

followers - are people who read your tweets

following - are the people whos tweets you read

@username - a message directed to a specific person that can be seen by everyone

DM - direct message - these are completely private

What do I tweet about?

As was mentioned earlier, think of twitter as a large cocktail party. If you are at a party and the person next to you continued to tell you over and over how and where to buy their products, would you hang around very long? No, I didn't think so. On the other hand, if the only thing they told you was that they got up and had bacon and eggs, then went for a walk you wouldn't hang around much either. The key to twitter is to post things that are interesting to you or that you feel might be interesting to others. Did someone tell you a great joke? Post it! Did you find something really cool on the internet? then post that link.

Conversely, if someone posts something that you found interesting, then tell them! Its all about making contact. You may even want to follow their tweets!

How do you find people to follow? One of the best methods I've found is to use the 'search' function on the right sidebar. Pick a topic you are interested in. If you see someone who sounds interesting, follow them! If someone makes you laugh, send them an @message!

One very useful twitter Resource I've found is Twitter 101 for business.

The power of twitter is there... just harness it to its full potential.

Follow crochetgal on Twitter at http://twitter.com/crochetgal

Monday, November 8, 2010

Are you mentor material?


Mrs Quill the English Teacher by TheHouseOfMouse

Are you an experienced etsy seller interested in helping new or struggling etsy members with their shops and questions?

Have you thought about joining the Sellers Assisting Sellers team?

We'd love to welcome some new mentors to the team to help with answering enquiries and running critique sessions. If you think you might be interested in joining, you can find out more information here: become a mentor.

You can also apply directly via our new team page here: TeamSASsy

Looking forward to seeing some fresh faces :)

Wednesday, October 27, 2010

Team SASsy Interview: Mango Tango Designs

You've seen us in the Etsy forums, visited our Facebook page, maybe even asked us for advice. Or, perhaps you've joined the team yourself. But really, who ARE Team SASsy?

We decided to find out and asked team members to interview each other so that we could discover who really makes Team SASsy rock! Here's the first interview in the series - watch for more to come!

Team SASsy member, cindylouwho2, from Calgary, Alberta, Canada, spent some time interviewing fellow team member Mango Tango Designs, from Cape Cod, Massachusetts, USA.

cindylouwho2's shop, Peacock Jewellery, was named for her love of peacock pearls, paua abalone shell and her peacock day gecko. The shop is filled with beautiful (and affordable!) jewellery made with natural materials such as gemstones, pearls and shells, as well as crystals and glass.

Abalone Shell and Pearl Cluster Earrings, Blue and Purple Paua Shell from Peacock Jewellery

Here's her interview with Mango Tango Designs:

How did you get started making jewellery?
A close friend suggested I register with her for a nearby jewelry class. The subject of that class was metal clay. I simply could not believe that a type of clay existed which, when fired, would become pure silver. To me, that was magical and completely addictive.

Did you always intend to run a jewellery business?
Not at all. I actually began handcrafting in 1990 in a completely different category – scale dollhouse miniatures. I sold my work online and at shows – just as I do jewelry now – for many years. Eventually the labor involved took its toll on me physically, and I switched because I found jewelry-making to be much less physically demanding. I believe my training in scale miniatures transitioned well to jewelry, as I was already so familiar with the necessity of precision and detail in my work.


We are often advised to have a niche or theme/unifying look for our shops. When I look through your beautiful listings I am struck by the repetition of the ocean theme, right down to the background colours. Was that your initial intent, & has it changed over time? What would you recommend others do to find a unifying theme or look?

My initial intent was certainly to have a unifying theme at least in the background of my photos if not in the work itself. At first I used slate and marble, but I found that too be too dark and gloomy. Once the theme of my work evolved into what it is now – which wasn’t an overnight process either; it took me a while to find my voice - finding a more suitable background was easier. I would definitely recommend that every seller find some way to make a cohesive statement in their Etsy shop – not only in their photos, which should be sharp and focused, but in their banners and avatars as well. Even when the merchandise is diverse, a common background that’s uncluttered and flatters the subject matter helps to sell the product.

You list several upcoming shows in your shop announcement – are they a big part of your business? Do you have recommendations for people who want to do art shows & festivals?

The bulk of my business actually comes from selling online and through a wonderful local gallery. Shows can be a hit or miss proposition. The juried shows which draw thousands are extremely expensive to do, and the unjuried shows may be less expensive but frequently draw smaller crowds and therefore fewer customers. I worked hard to jury into a local artisans’ guild that holds their own shows in order to guarantee myself booth space at a reasonable cost.

My advice to others is to be certain you have product that people want to buy. If you work in a competitive field such as jewelry, it can be very, very difficult to jury into some of the better shows. Be prepared to soldier on and keep pushing in the face of rejection and disappointment. Find a niche and fill it. Be unique.


Finish this sentence (but feel free to write more than a sentence!):
Before I started my Etsy shop, I wish I knew_______________

I wish I knew the formula for making high-quality, inexpensive product that would fly out of my shop! I see now that my style of jewelry is nearly impossible to craft less expensively, and so I accept that I will never be one of Etsy’s top sellers. And yet I’m pleased with the way my work has been embraced on Etsy and feel quite satisfied selling here. There’s a market for my work and I couldn’t be more pleased about that.


How did you get involved with Team SASsy? Has it been what you expected?
I love helping others. I also have a teaching background, and volunteering to assist others helps me to scratch that itch. Also I believe in karma. The good that I do for others will someday come back to me when I most need it. I derive tremendous satisfaction from a heartfelt ‘thank you’ from someone I have assisted on Etsy.

If you had the ability to start a completely different handmade business, what would you choose to do?
I guess I’d have to say there’s nothing else I’d rather be doing. Since I began handcrafting a totally different type of product, where I am now is precisely where I’d like to be.

And your final words of wisdom:
I think that what each of us gets out of Etsy depends entirely on what we put into it. Not everyone has the ability to create something that someone else wants to buy. If what you’re currently doing isn’t working, try something else. There’s always room for improvement. Do what you love and love what you do.


Thanks again to cindylouwho2 of Peacock Jewellery and Mango Tango Designs for this great interview!

Wednesday, October 6, 2010

Top Tips from Kreated by Karina

Written by KreatedByKarina.etsy.com


I've recently celebrated 4 years on Etsy! To mark the day, I thought I'd share some of my best-kept secrets from running Soap That Makes Scents (well, ok, they are not really secrets but rather segments of advice I have given out in the forums or in convos as a member of the Sellers Assisting Sellers Team). An FAQ of sorts, and it's all here in one place for you--might be a long read but you can pick out the parts you find useful to reach your own level of success:

~ Promoting ~

Probably the most common question I get asked is "how do you promote?"

My best tip is to figure out your target audience and promote directly to them.

Promoting to a wide audience is fine, but in the end you'll save yourself a lot of time, money and energy focusing your advertising strategies on those people who are more likely to purchase your products.

Think about the ideal person who would shop in your store---how old are they? What sort of websites/blogs would they most likely visit? What kind of magazines do you think they likely to read? What areas of the city would they live in? You can expand to other brainstorming questions but those few should give you a good start in figuring out the type of people who frequent your shop (as well as the type of people you want to direct your items to).

Once you've figured out your target audience, you can then take out ads on those same blogs, websites, magazines etc. Or concentrate on doing craftshows geared towards that "type" of audience.


~ When Selling, Think Like A Buyer ~

For instance...when trying to figure out how to tag your items, think of how YOU search for items when shopping. Do you search by color, or by certain keywords you find yourself using over and over? If so, use them in your tags as well. A great way of figuring out how to describe/tag your item is to ask friends and family. Let them take a look at what your selling (or give them a sample!) and ask what single words they would use to describe it to others. Pick out the most relevant and common ones and use those as tags if they fit, or incorporate some of their suggestions into your item descriptions.

Also---think about what promotional tactics work on YOU. Do you sign up for lots of newsletters? Maybe it's time you offered one of your own to your customers. Do you find yourself throwing away business cards, but keeping magnets and always reminding yourself "to check out that store" everytime you see it on the fridge? Invest in getting some promotional magnets made to give out with your orders or to people you meet. Things like that.


~ Organization Is Important ~

When I started out, I had supplies laying around everywhere--and I mean *everywhere*. My husband used to joke that at times he felt as though he lived in a warehouse. I realized that I was wasting a lot of time by having to go to one place for a box/envelope, one place for a pen, one place for a business card and soap sample, one place to collect the invoice, etc. Now I have a room dedicated to packaging, shipping, wrapping and labelling--Everything is stored in clear plastic bins, and out of reach from tiny hands. Recently we moved the computer in there as well just to make things even more easier. Keeping everything in one place can streamline the process from the time you receive an order, to the time it's shipped out.

~ Going Full Time~

(I took this part below from part of my QYDJ Storque interview so it may seem repetitive if you've read it)

Another common question I get is about how I made the transition from part-time soapmaker to full-time soapmaker. The easy answer would be "I just took the leap, and everything worked out fabulous!!" The more realistic answer is that it was a lot of planning ahead of time, tight budgeting to make my business self-sustainable and turn a profit, plenty of sacrifice (time, energy, luxuries), a bit of luck, and old-fashioned hard work.

If you don't have a Business Plan drawn up, I seriously urge you to get one. You can find lots of information and templates (as well as full examples) at http://www.sba.gov/ It truly is my opinion that no business can succeed fulltime without one. My husband and I sat down and wrote ours several years ago. A business plan covers not only your company's mission and planning out your target audience, but also your fiscal projection for several years ahead, all costs associated with running it from the beginning (ie. licence cost, capital needed, utilities, supplies, advertising budget and a slew of other areas), HOW you plan on covering these costs, short and long-term goals, and will become your Business Manual of sorts. Plus, if you need to go to a bank for a loan to finance your business at any time, many will want to see your business plan (which should then also cover how you plan on paying your lender back).

As it stands now, Soap That Makes Scents pays for itself, with enough left over to pay our bills and rent, as well as groceries, etc. Etsy has been incredible in exposure and while they are the forefront and a large part of my business, I would be remiss if I did not acknowledge that craftshows, wholesale accounts, and private soap parties (and online soap parties!) make up a large portion of my income--although I wouldn't have gotten any of those accounts if it hadn't been for them finding me on Etsy.com

It's our goal for my husband to quit HIS day job in either 2011 or 2012 by the latest. He's already taken the first step by reducing his hours at work.


~Newsletters Really Do Help~

It was just after the holidays last year that I discovered the wonderful world of having a mailing list. I used to have a blog, but stopped posting in it 'cause it a) seemed too difficult to come up with something exciting to say each time, and b) started to get disheartening wondering if anyone was actually READING it. Starting a mailing list can be one of the best moves promotion-wise. People should hav eto opt-in to receive your email blasts and you know that it's going directly to people who are already interested in what you do and are most likely to shop in your store.

http://www.bravenet.com/ is a simple site for setting up a free mailing list (you can have up to 500 subscribers at no cost and send unlimited emails, plus receive statistics on who's actually read your newsletter). I keep my newsletters to once a month, and advertise my newsletter sign up at craftshows, in my auto-Message To Buyers, and in my shop announcement/profile. My shop views and sales have risen due to special offers given to readers-only.


~But What About Money??~

Budgeting is an important factor at any time in your business, but moreso in the begining stages. You should have a tight budget drawn up before considering quitting your dayjob as well as a sizeable nest-egg set aside to help you through any rocky starts or rough patches along the way. I didn't entertain the idea of quitting my day job to make soap all the time until my online part-time business was already sustaining itself and turning a good profit. A good experiment to see if you can survive on your craft alone, is to bank your paychecks for a period of one year and just live off of what you are making from your home-based business. This not only teaches you a valuable lesson in what are really the neccessities in your life, and where you can cut future costs but also gives you an accurate figure of how much money is coming into the household vs. how much is going out.

Even if you have no plans to take your business full-time you'll want to draw up a budget and stick to it as best as you can. A simple way to keep track of things is to keep organized receipts for everything month-to-month....your crafting supplies, the ink you had to buy for your printer to make your labels/promo materials, your packaging supplies, (even the tape you buy to secure your envelopes properly), anything and everything. Also keep track of your Etsy bills and any other online fees you pay month-to-month (project wonderful advertising, domain name hosting, etc.). This also makes tax-time so much easier, believe me.


~It's Ok To Keep Track Of The Competition~

Really---big companies keep ontop of each other all the time. It's ok to be aware of what your direct competition is doing and perhaps learn from them as well. I'm not saying be fanatical about it, or obsess over every little move they make, or try to copy everything they do thinking it will work for you (most of the time, it won't). What I'm getting at is being aware of who are the "big sellers" in your category and why you think people are drawn to their store. For example, If you notice one of your competitors is frequently on the Front Page or chosen for Treasuries...take a look at their photos, study the techniques they use...or the props chosen that may best show off their items, and get your inspiration for improving and tweaking your own shop photos from there. Take a look at their tags if they carry like items and see if you are missing any key ones (like color of the item, size). Read through the feedback left for them and see what stands out most to you in a buyers' own words: is fast shipping frequently mentioned as a high-point of the transaction? Is that something you can improve on for your own shop? What specifically gets mentioned time and time again? Do dozens of customers rave about how wonderful the communication was from the seller----and do you think that's something you can work on too? Feedback from customers is the #1 way of figuring out how to improve, and give a buyer what they want...you can learn from them whether they are your customers or your competitor's.


Well, that's about all there is for now--I know it's a long read, and by no means is my word the be-all or end-all of anything-...the opinions/outlooks above are based on my own adventures in EtsyLand, and overall business...best of luck with your own journey!

Karina

Written by KreatedByKarina.etsy.com
Find Karina on Facebook