Written by TheHouseofMouse
Great photos are one of the most important things to get right if you sell online. Your photographs are your virtual shop window: If they are not light, bright and eye-catching then often buyers will surf right past your store without even noticing your work. Really beautiful photographs will bring buyers through your virtual door and keep them there long enough to remember your creations.
These photography tips are designed to help you make your photographs looks bright, eye catching and professional and you don't need to have an expensive camera to do this!
This tutorial comes in two parts:
- How to make a Light Box
- How to edit your photos to make them pop
Part 1: How to make a Light Box
These tips are one way of taking great photos, but they are certainly not the only way. I hope that you will be able to use this tutorial as a starting point and gain the confidence to make photographs with your own style.
First select a box that is the right size for what you want to photograph. For small items like jewelery a box about 30cm wide or 1 foot is good, although if you want to photograph larger items you will need a larger box.
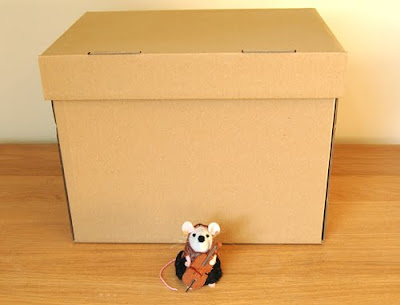
Cut out the top of the box and the front, leaving a bar across the top to help your box keep it's shape
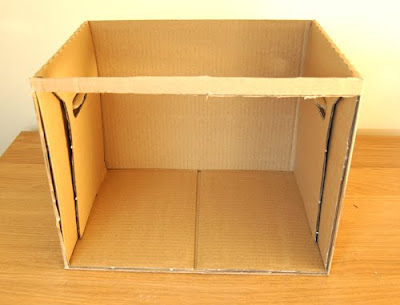
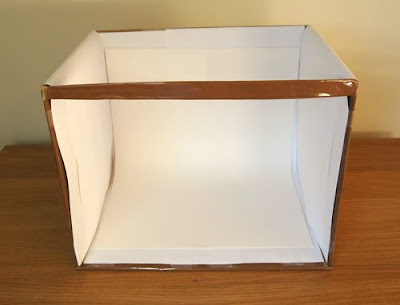
Line your box with white paper, making a curve with paper in the back horizontal corner so that it won't show up in your background.
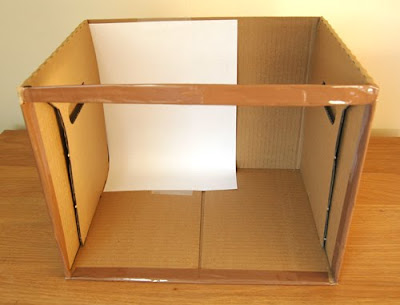
Make sure you put white paper on the sides too, this will help to bounce the light around even more and make your photographs really bright.
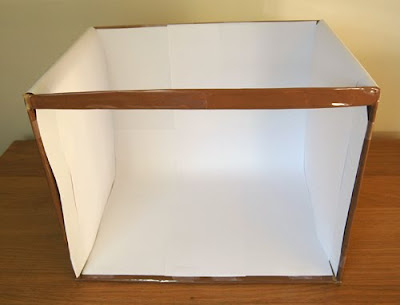
To avoid any lines in your photographs, use a large piece of paper for your backdrop, I love to have a white background so I am using a piece of A3 white card, but you can use any color you like. You can also use fabric if you prefer.
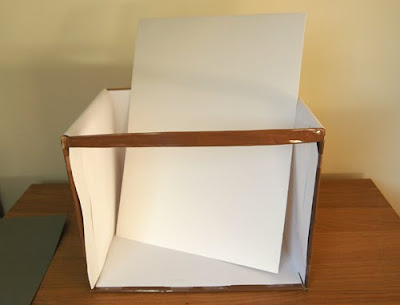
Stick or pin your background in place,
again making a curve in the horizontal corner.
again making a curve in the horizontal corner.
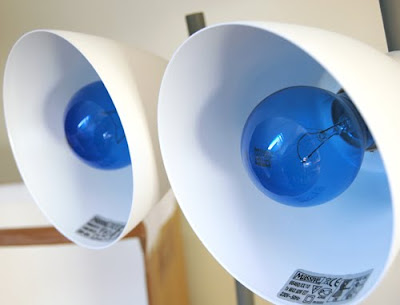
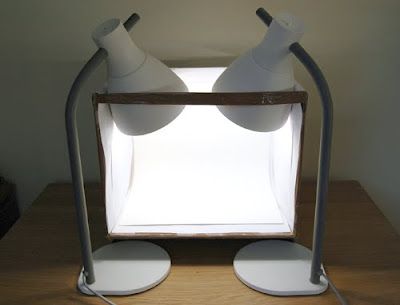
Your light source should be 2 adjustable lamps with daylight light bulbs, 100watts will get a great result. Daylight light bulbs are best because the colors in your photographs will be more accurate than if you use a regular yellowish bulb. Daylight light bulbs look bluish when they are not on. You can get daylight light bulbs from any good electrical store, some art supply stores also stock them as painters prefer to use them too.
Arrange your lamps on either side of your light box, if the stands poke under your box -as they do in mine - then stand your box on some books to make it flat. Some people prefer to just use one lamp, but I find using 2 will eliminate all shadows and shows up the details on your work much better.
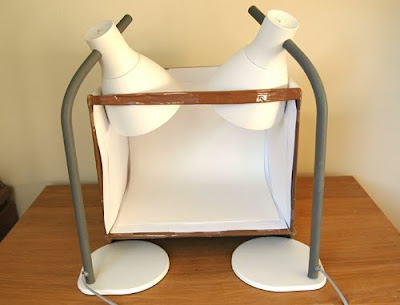
As you can see, when the bulbs are on the light bounces around in the box in all directions! Perfect for taking bright photographs
If you have a tripod for your camera then set it up in front of your light box, if you don't have a tripod then add one to your christmas list! For now you can stand your camera on something to balance it.
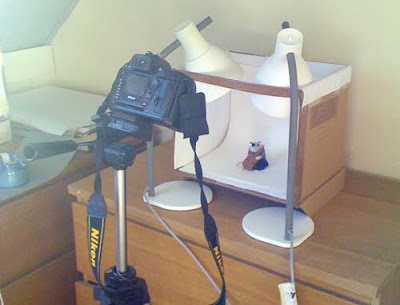 The reason for the tripod is that you don't want to be using the flash on your camera. If you turn off the flash on some cameras then any photographs taken with the camera in your hands will look shaky, the tripod will keep it stable and make your photos nice and clear.
Finally your light box is ready! Place your items in your light box, switch on your lamps, arrange your camera (remember to switch off your flash) and take some photographs!
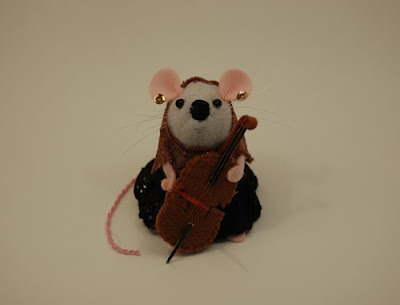 Every camera is different, some of you may find that you are happy with the photos you get just from the light box. But if you are like me you will still want to make them brighter. Part 2 explains how to do this...
Part 2: How to edit your photos to make them pop
So you have your photos from your light box, but they are still a little dark and dreary. This tutorial will show you how to edit your photos to brighten them up and make them really pop!
To do this you will be using the "levels" tool that is found in almost every photo editing software. I will be using Photoshop for this tutorial. If you don't have any photo editing software then I recommend you try picnic which is a free and simple photo editing site (to get to the levels tool on picnic: upload a photo, then click "exposure" and then "advanced").
To open the levels tool in Photoshop, click the "layer" menu then "new adjustment layer" and select "levels", then click "ok" to open the tool.
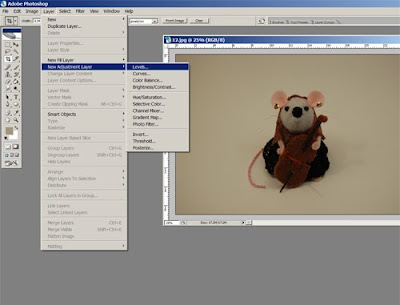
The levels tool looks like a graph or histogram. By using the dropper feature and sliding the arrows around you can create different effects, including lightening up your photographs.
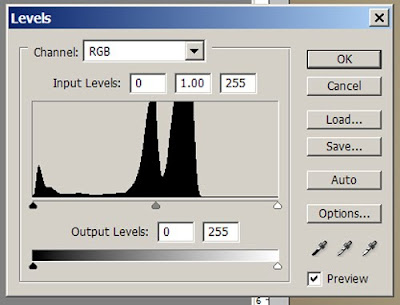 Use the dropper feature to select the lightest color in your photograph. (The dropper does not appear on the picnic website, but it will appear in Photoshop and a few other photo editing programs.)
The dropper is the 3 little icons in the bottom right corner of the levels too. You can use these to select the darkest, lightest and medium tones from your photograph. For my purposes I only want to use the lightest one (on the far right) but feel free to play around with them to see the affects you can get.
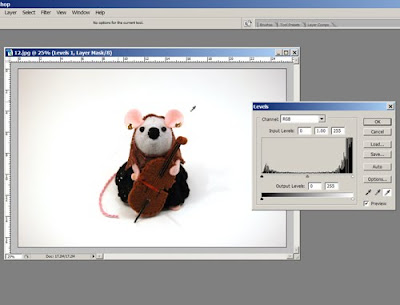
Select the white dropper and then click it on the lightest part of your photograph. You can keep choosing a new part until you are happy with the result. As you can see, I have selected the brightest area of my background. This will automatically readjust the photograph.
Next you can also use the arrows on the slider under your histogram to lighten or darken your photograph further. If you are using picnic then this will be your main way to lighten your photographs. Click the arrow in the middle of your histogram and slide it to the left and right to see the results
Slide it to the left to lighten your photograph
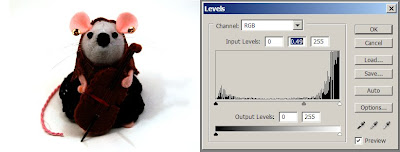
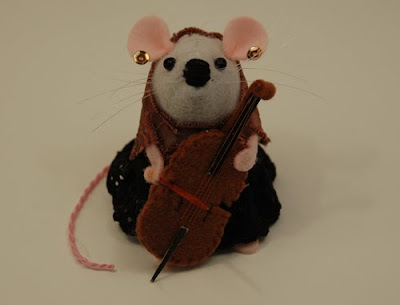
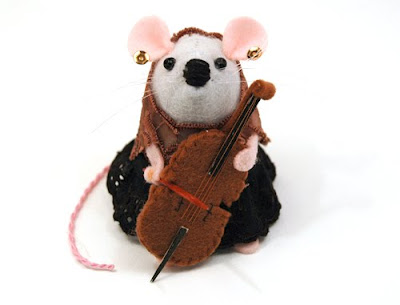
I just want to lighten my photograph slightly so that you can pick out the details in the Cellist Mouse's skirt. When you are happy with your adjustments click "ok"
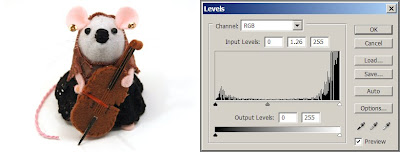
If you are using Photoshop, you will need to "flatten" your image before you can save your document as a .jpg . To do this select the "layer" menu and click "flatten image" you are now free to save your file. Feel free to crop your image if you want to before you save.
Here is what my photograph looks like before and after using Photoshop to brighten it up...
Written by TheHouseofMouse

